
From the Toysit archive
Edu Science Junior Electric Lab
Follow a circuit’s path, predict an output and compare one documented change with the electronic lab kit in Toysit’s archive.
The play at a glance
Make the connection between a diagram and a result
An electronics kit can turn an abstract diagram into something that responds. The useful question is not simply whether a project works, but what path connects its parts and what changes when a control is used.
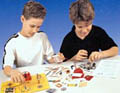
Toysit’s short original entry names the Edu Science Junior Electric Lab. Its picture and two promotional sentences do not identify a complete parts list or a circuit plan. The activity below is a way to read and discuss a matching project guide, not a substitute wiring diagram.
Read one project before connecting anything
Start with the manual that matches the kit’s model and parts. On a simple project diagram, point out the power source, the connecting path and the part intended to produce an effect. That part might make light, sound or motion in a kit that includes it; the old Toysit picture does not confirm which outputs this set offers.
A child can trace the printed route with a finger and predict what a documented switch or control will do. If the matching manual is missing, keep this as a paper activity until the kit can be identified.
Understand the loop
In a simple powered circuit, current needs a complete conducting path through the intended components and back to the source. A break in that path is an open circuit. A short circuit bypasses the intended load and can allow excessive current; joining a battery’s terminals directly is not an experiment to try.
SparkFun’s introduction explains these terms. Its sample circuits illustrate the concepts, but their components and connections should not be transferred to an unidentified toy kit.
Predict, observe, explain
For a project assembled and checked according to its own manual, use three short notes:
- Prediction: what do you expect the documented control to change?
- Observation: what actually happened when it was used?
- Explanation: which part of the diagram helps explain that result?
Compare one manual-approved change at a time, returning to the starting arrangement between comparisons. Use the specified power source and the manual’s procedure for disconnecting power before changing connections.
When a result does not match the prediction
Go back to the numbered project diagram and compare it with the setup, one connection at a time. An adult should check part markings, polarity and power requirements against the correct instructions before another attempt.
A useful session can end with a better question rather than a working gadget. Distinguish a part you have identified from a part you are guessing about, and record what still needs checking.
The historical record
Original Toysit coverage
The original description and later general discussion of electronics kits are preserved below. References to LEDs, robots, resistors, capacitors and transistors describe electronics activities broadly; they do not establish that these parts or projects were supplied in this kit.
Edu Science Junior Electric Lab.
Comprehensive, includes many important aspects of electronics. The perfect gift for any young scientist.
Electronic kits are powerful educational tools that can ignite a passion for science and technology in children. Here's how they achieve this:
- Hands-On Learning: Electronic kits provide hands-on experience with real electronic components. Children can build circuits, experiment with different connections, and see the immediate results of their work.
- Understanding Basic Concepts: By working with electronic kits, children gain a fundamental understanding of concepts such as current, voltage, resistance, and how different components like resistors, capacitors, and transistors function.
- Encouraging Creativity: These kits encourage creativity by allowing children to design and build their own projects. Whether it's a simple blinking LED or a more complex robot, the possibilities are endless.
- Problem-Solving Skills: Building electronic circuits requires logical thinking and problem-solving. Children learn to analyze problems, troubleshoot errors, and find solutions, enhancing their critical thinking skills.
- Integration with STEM Education: Electronic kits align with STEM (Science, Technology, Engineering, Mathematics) education goals. They provide practical applications of theoretical concepts, making learning more engaging and relevant.
- Collaboration and Teamwork: Working on electronic projects often involves collaboration. Children learn to work together, share ideas, and contribute to a common goal, fostering teamwork and communication skills.
- Connection with Real-World Technology: By building and understanding electronic circuits, children gain insights into how everyday technology works. This connection with real-world applications makes learning more meaningful and exciting.
- Building Confidence: Successfully completing a project with an electronic kit builds confidence and a sense of accomplishment. It empowers children to explore further and take on more complex challenges.
Electronic kits are more than just toys; they are educational platforms that provide a fun and interactive way to explore the world of electronics. By engaging children in hands-on projects, they foster a love for science and technology, develop essential skills, and lay the foundation for future learning and innovation.
Sources and editorial notes
The source text and photograph were reviewed on October 15, 2026. SparkFun’s circuit tutorial supplies general electrical context. An exact Edu Science manual, parts inventory and power specification were not established; instructions for another kit have not been substituted. No physical circuit or learning outcome was tested.
- SparkFun: What Is a Circuit? — General explanation of a circuit, its load, and open and short circuits; not this kit’s project manual.
Images and descriptions are retained as historical material. How Toysit covers toys.
Created for Toysit by Tabbloza — the artwork in our header.